
Little noses wrinkle up. “But I don’t like saeurkraut!”
If your kids are anything like mine, you might have a hard time getting them to actually consume any of the fermented foods you know are good for them. While homemade saeurkraut is very different from the soggy stuff you can buy at the store, it’s still saeurkraut — and that’s not everyone’s top choice.
Try Salsa Kraut Instead (or in Addition)
Salsa kraut (adapted from Salvadoran “curtido”) is a happy middle ground between fermented salsa and saeurkraut. It doesn’t ferment as long as traditional saeurkraut (softer veggies, like tomatoes and peppers, don’t hold up as well over long ferments as sturdier veggies like cabbage and carrots), so it isn’t fully equivalent in terms of what bacteria are present. But because the base is cabbage, rather than carrots, it can be a better option during winter, when tomatoes are out of season.
This is, so far, the only ferment that everyone in my household will eat. The salsa kraut has a spicy flavor, similar to true salsa, but a fairly mild heat level. If you want it hotter, try swapping out the jalapeños for a hotter variety of pepper.

If you’re already familiar with making saeurkraut, this should be easy. It’s exactly the same process, just different vegetables. (And it doesn’t ferment for long, which saeurkraut can. I usually ferment my regular kraut for about a month.)
Fermented Salsa Kraut – the Recipe

Calories
Fat
Carbs
Protein

This saeurkraut derivative tastes more like salsa than saeurkraut, but relies on cabbage as its base rather than tomatoes, making it a good winter option. It's spicy, but fairly mild -- this is the only fermented food my whole family will eat. If you want more heat, you should be able to swap out the jalapeños with a hotter variety of pepper.

 Save Recipe
Ingredients
- 1 small cabbage, sliced
- 4 medium carrots, peeled & shredded
- 3-4 garlic cloves, peeled & minced
- 3-4 jalapeños, minced
- 1 mini bell pepper, minced*
- RealSalt to equal 2 tsp. per pound of veggies
Instructions
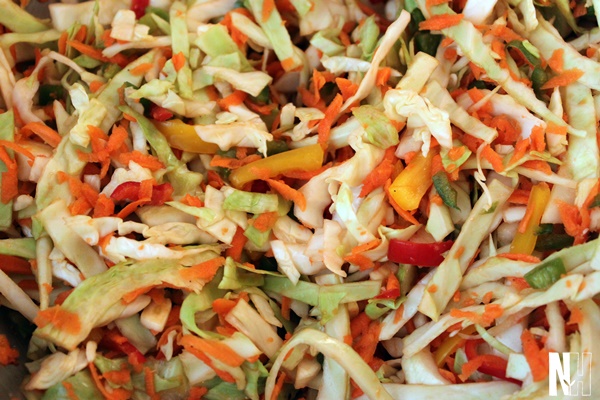
- Prepare all the veggies and toss together.
- Weigh, and add salt by weight.
- Let sit for about 15 minutes (this will make the next bit easier), then massage until the veggies begin to release their liquid.
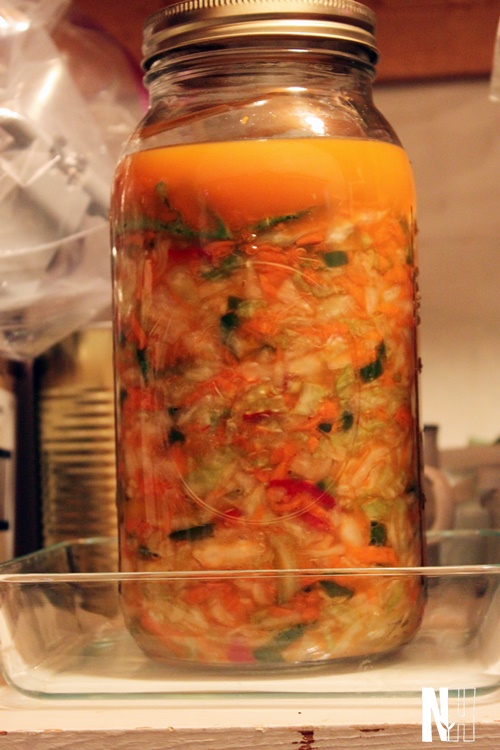
- Pack firmly into a mason jar (or jars), squeezing out all the air bubbles and making sure the vegetables are all below the surface of the liquid. Weight down so they stay that way.
- Cover loosely and leave in a cool, dark place (like a cupboard) to ferment for 5-7 days. (I like to put mine in a shallow dish in case the liquid overflows during fermentation.)
- Transfer to the refrigerator for longer-term storage.
Notes
*I usually use about one total mini "bell" pepper, but about half yellow and half red. This is not set in stone. As long as you use the right amount of salt for the total weight of the vegetables, you don't have to worry too much about having the "perfect" amounts.
If You’re New to Fermenting
Fermenting vegetables doesn’t require any special equipment, but I’ve found that fermentation weights (especially the kind with build in “handles”) are well worth the investment. And if you decide you’re going to work with kraut regularly, a saerkraut pounder is a helpful “luxury” tool. A fist works just fine for packing the kraut into a jar, but a kraut pounder can be even easier.
Other than this, I usually just use standard, wide-mouth mason jars. I use a traditional lid for the fermentation period, because that lets me screw the ring on loosely, and then switch to a one-piece lid when I’m ready to store it.
If You’re New to Fermenting with Peppers
I strongly encourage you to wear gloves while making the salsa kraut! Jalapeño juices all over your hands is not fun — and you really don’t want to transfer it to your eyes by accident! We keep a box of medical-style gloves around that specify they’re food safe to use when we’re working with this type of peppers. Not the most environmentally-friendly option, but definitely the more eye-friendly option.
Learn more about fermented foods in module 4 of Baby Steps to Better Nutrition & a Healthier Lifestyle.